Obsidian Beginner Guide: Install It and Understand the Interface

Many people install Obsidian and get stuck at the same point: the app is open, but they do not know what to do next.
There is a file pane, an editor, a right sidebar, icons, tabs, and settings. Then other people start talking about themes, workflows, and second brains. That is too much for day one.
This Obsidian beginner guide focuses on one job: getting from installation to understanding the interface. Just the basics you need to start writing.
If you are still unsure what Obsidian is, start here: Obsidian Tutorial: What Is Obsidian and Why Is It Called a Second Brain Tool?
Download Obsidian
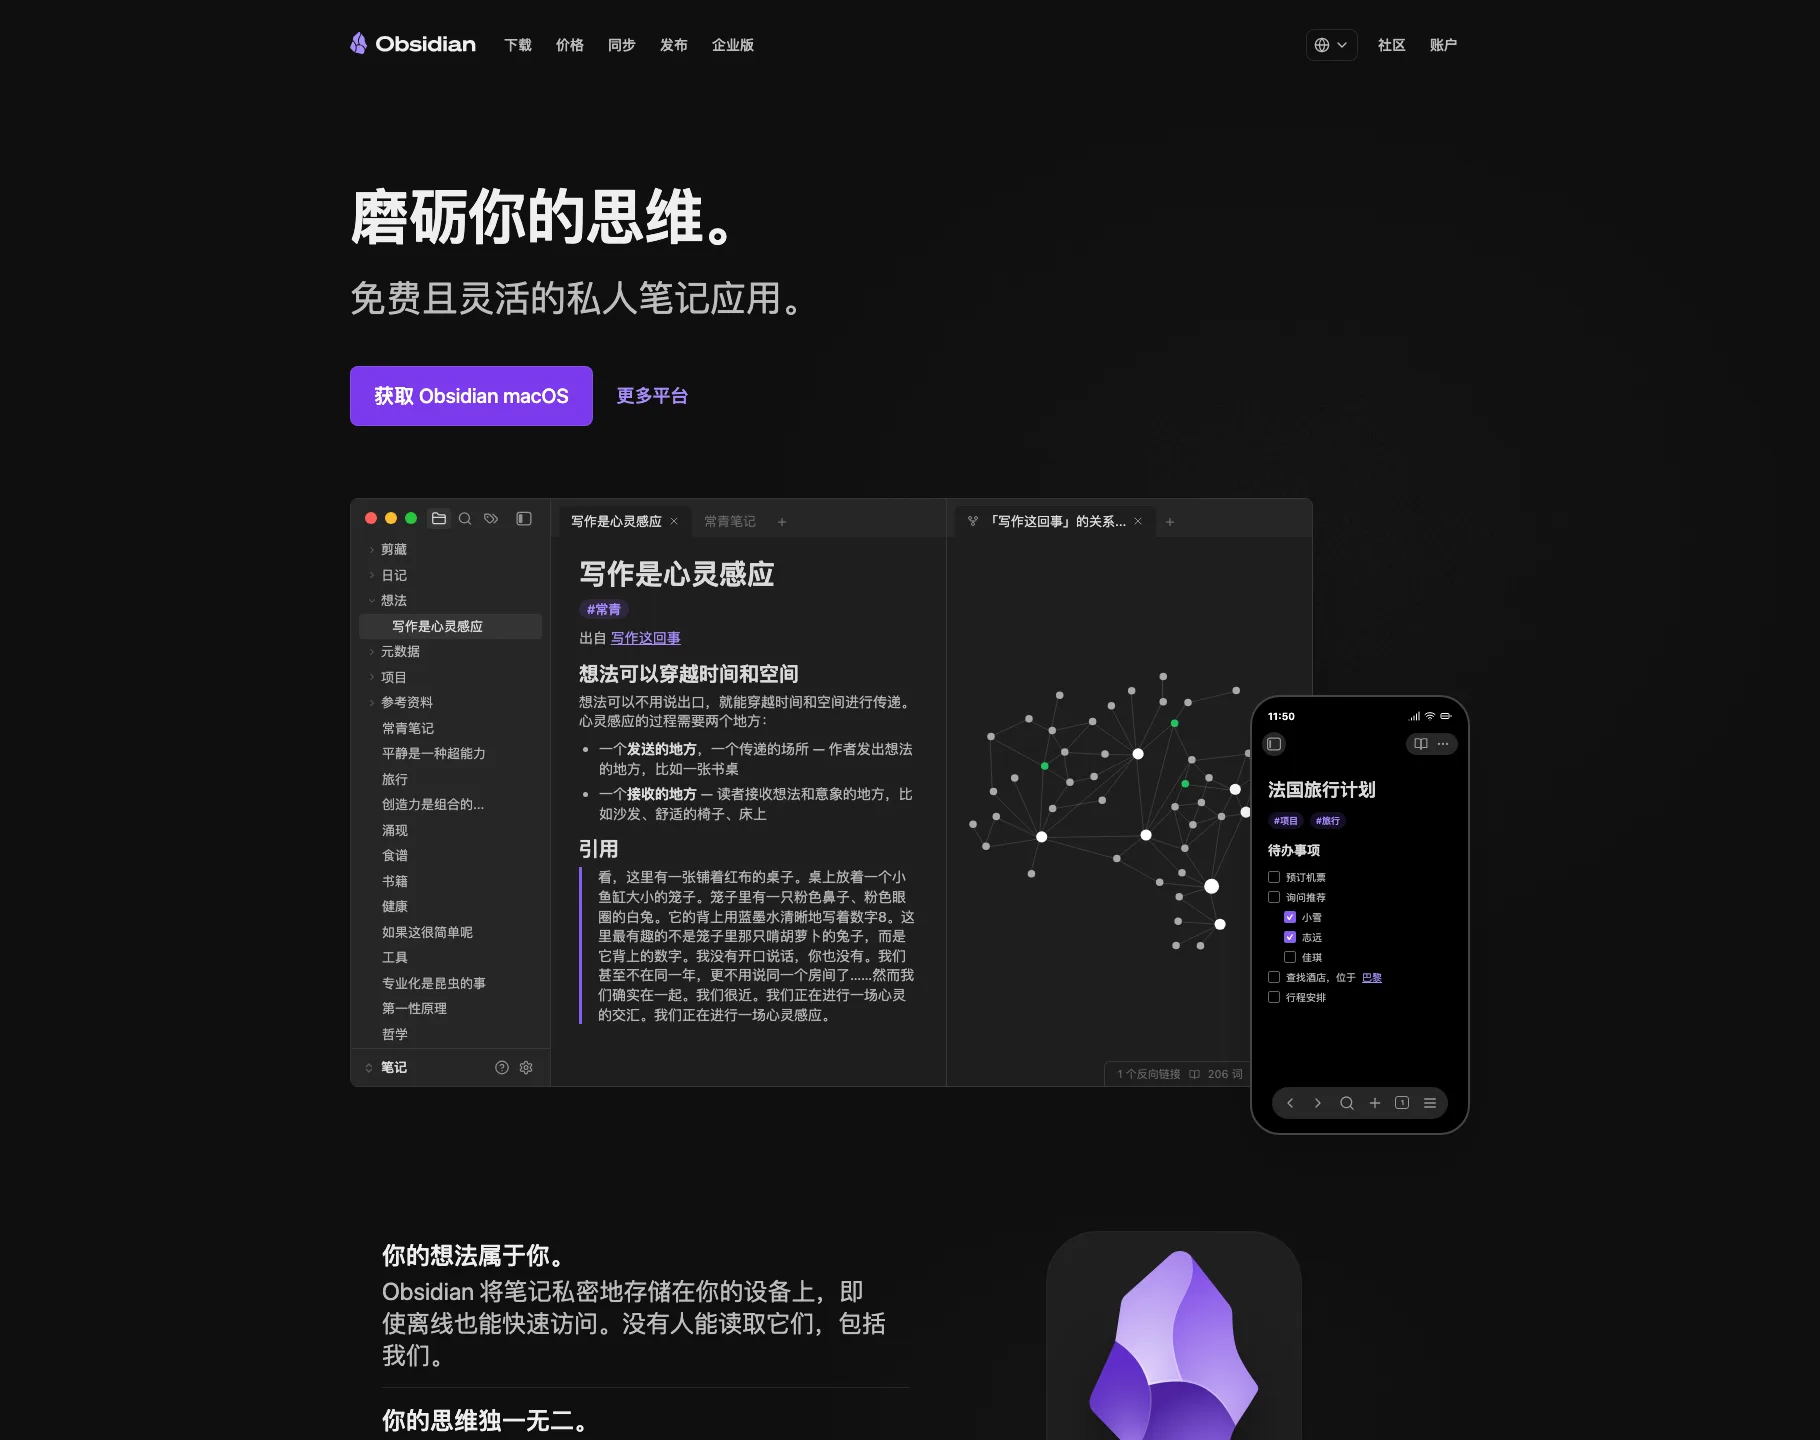
Download Obsidian from the official website.
Website: https://obsidian.md
Download page: https://obsidian.md/download
Avoid random third-party download sites. A notes app may store your personal writing for years, so the installer should come from a clean and reliable source.
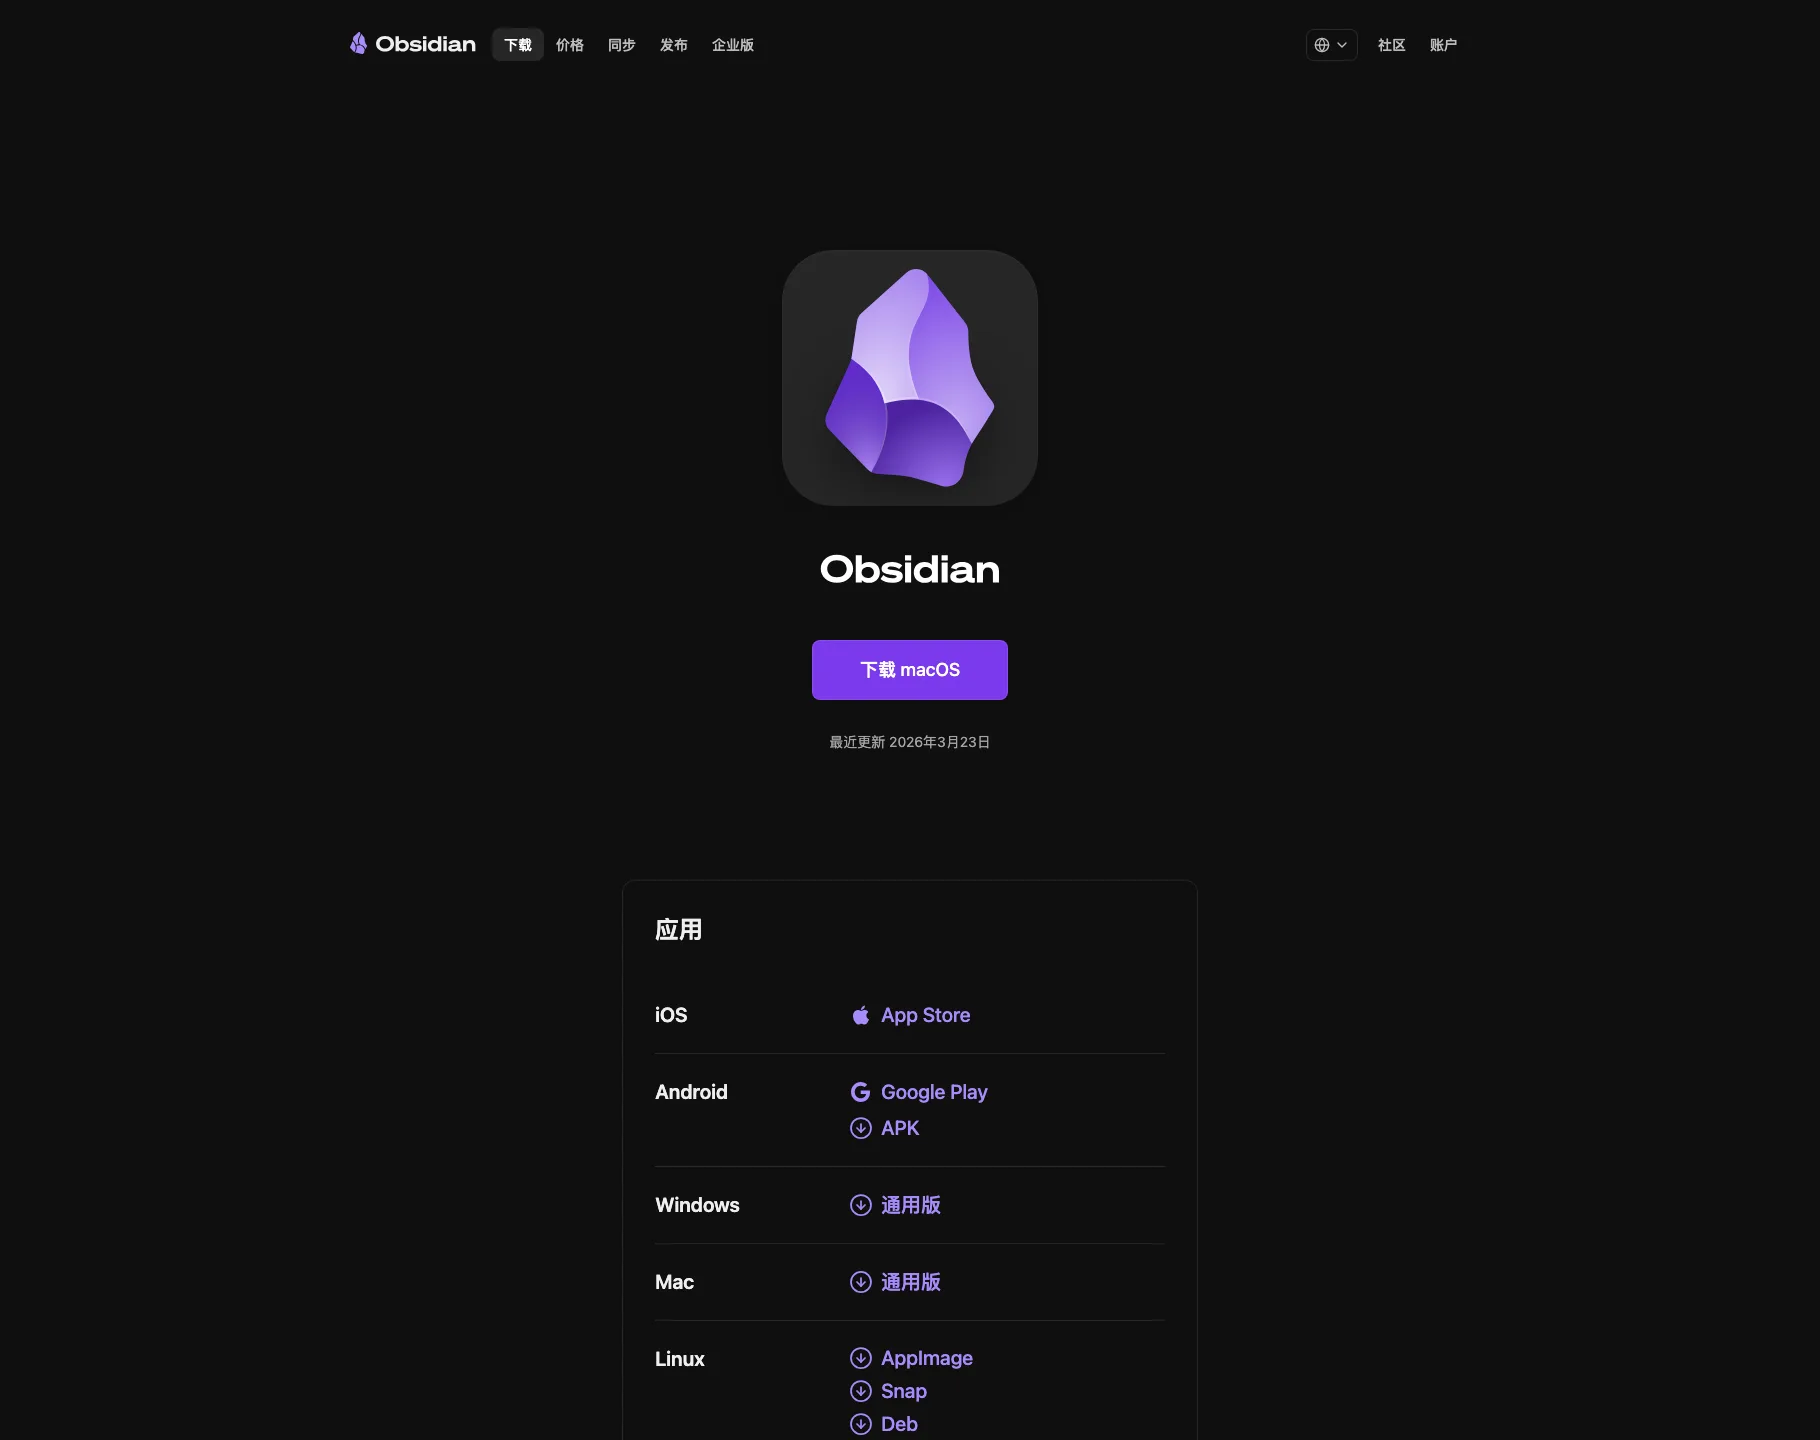
The download page usually highlights the version for your current operating system and also lists iOS, Android, Windows, Mac, and Linux options. Pick the version that matches your device.
Install Obsidian
On Windows, download the official installer, run it, and follow the setup wizard. Obsidian supports Windows 10 and later.
On macOS, download the macOS version, open the dmg file, and drag Obsidian into the Applications folder. If macOS shows a security prompt the first time you open it, allow the app in System Settings.
On Linux, choose the package that fits your distribution. Obsidian provides AppImage, Snap, Flatpak, and deb options.
Obsidian is also available on mobile. On iPhone and iPad, search for “Obsidian - Connected Notes” in the App Store. On Android, use Google Play or the official APK.
If this is your first personal notes system, start on desktop. It is easier to understand folders, vaults, and search on a larger screen. Mobile is better as a companion for quick capture and reading.
What You See the First Time
When you launch Obsidian for the first time, you will see a welcome screen. The important choices are creating a new vault, opening a local vault, and syncing a remote vault.
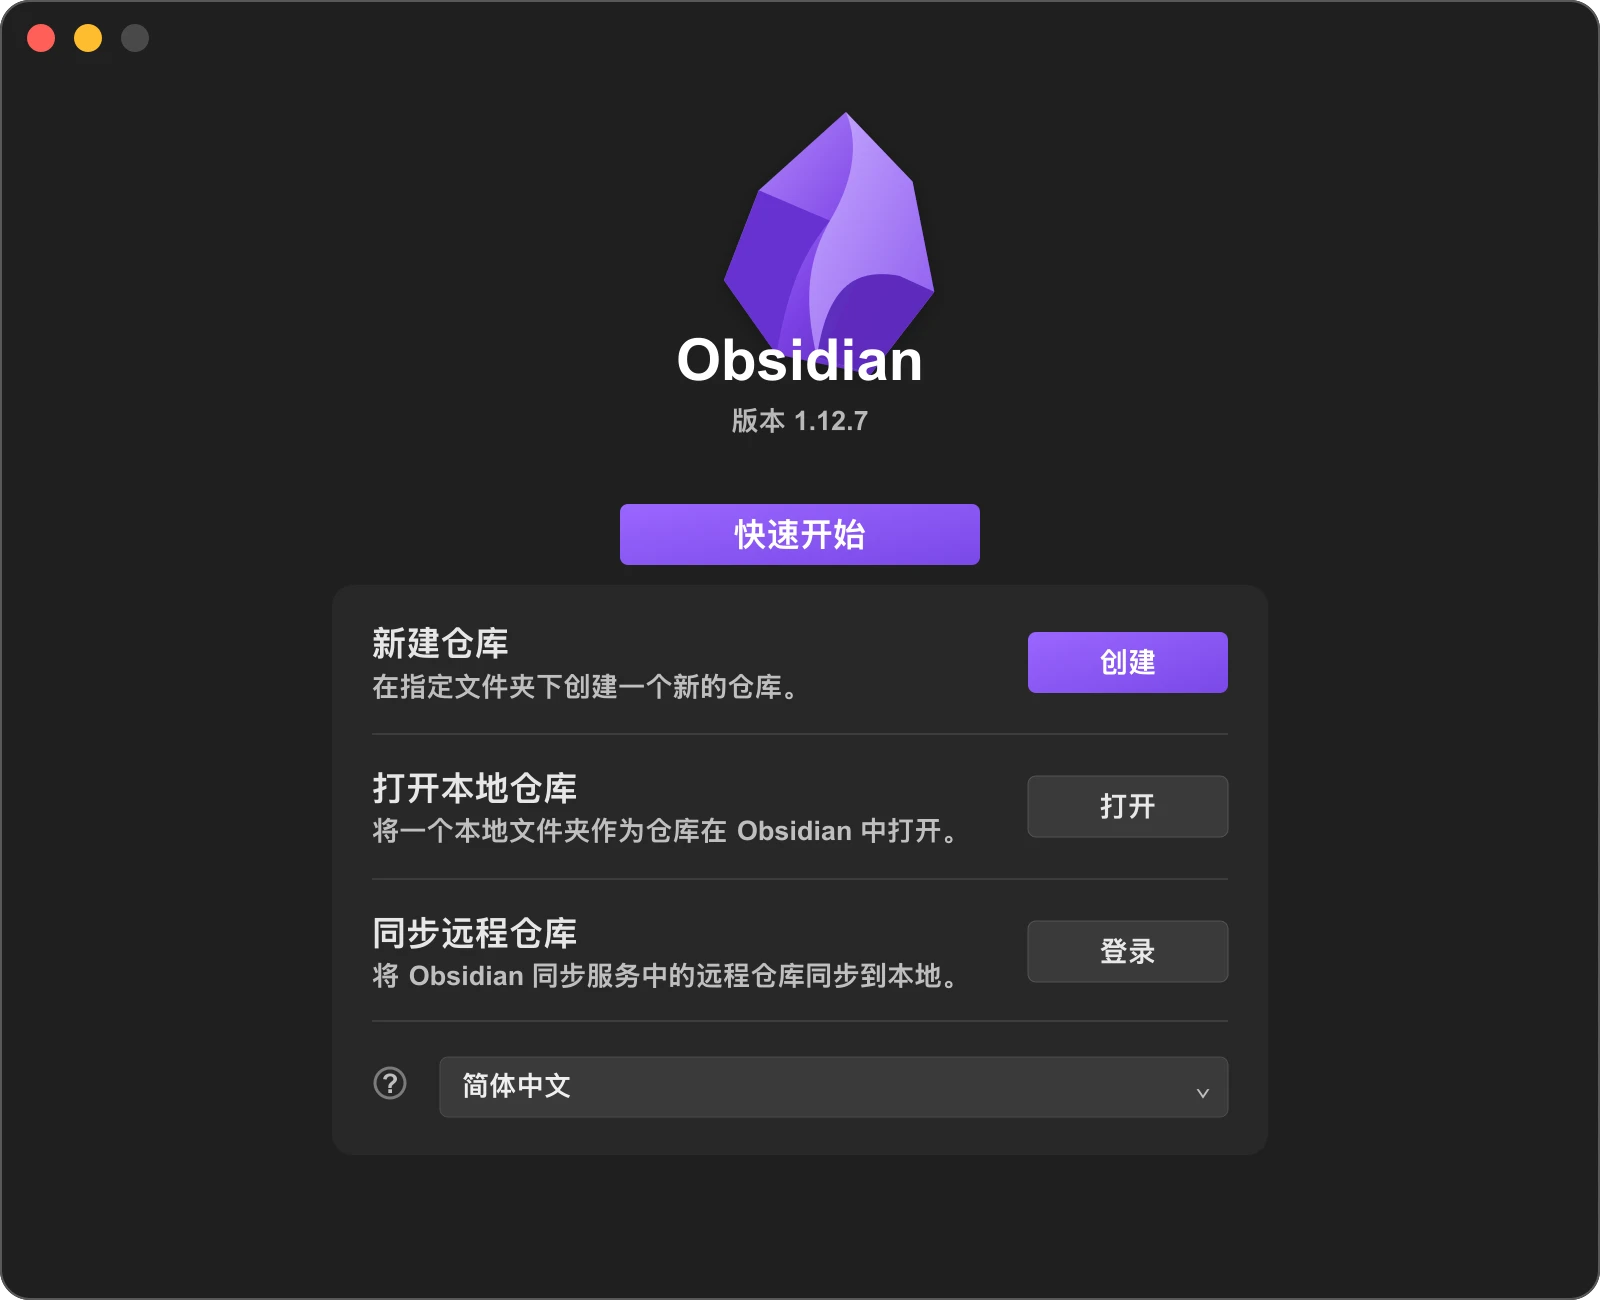
“Create a new vault” is for a fresh setup. You choose a vault name and a location on your computer.
“Open local vault” is for people who already have a folder of Markdown files. Obsidian does not need to import them or rewrite your folder structure. It simply treats that folder as a notes library.
You can ignore sync on day one. You do not need to solve every sync question before writing your first note. Learn local vaults, files, and the interface first. Sync can come later.
What Is a Vault?
In Obsidian, a vault is your notes library.
Do not overthink it. A vault is just a normal folder on your computer.
The difference is what Obsidian does with that folder:
- It treats the folder as a notes library
- Markdown files become notes
- Search, file management, and basic interface features work inside that folder
For example, if you create a vault called “My Notes,” Obsidian creates a folder at the location you choose. The notes you write are Markdown files inside that folder.
Beginners do not need multiple vaults at the start. Create one vault and begin writing. Split work, study, and writing into separate vaults only when you have a real reason.
The Main Interface
After opening a vault, Obsidian is divided into a few stable areas.
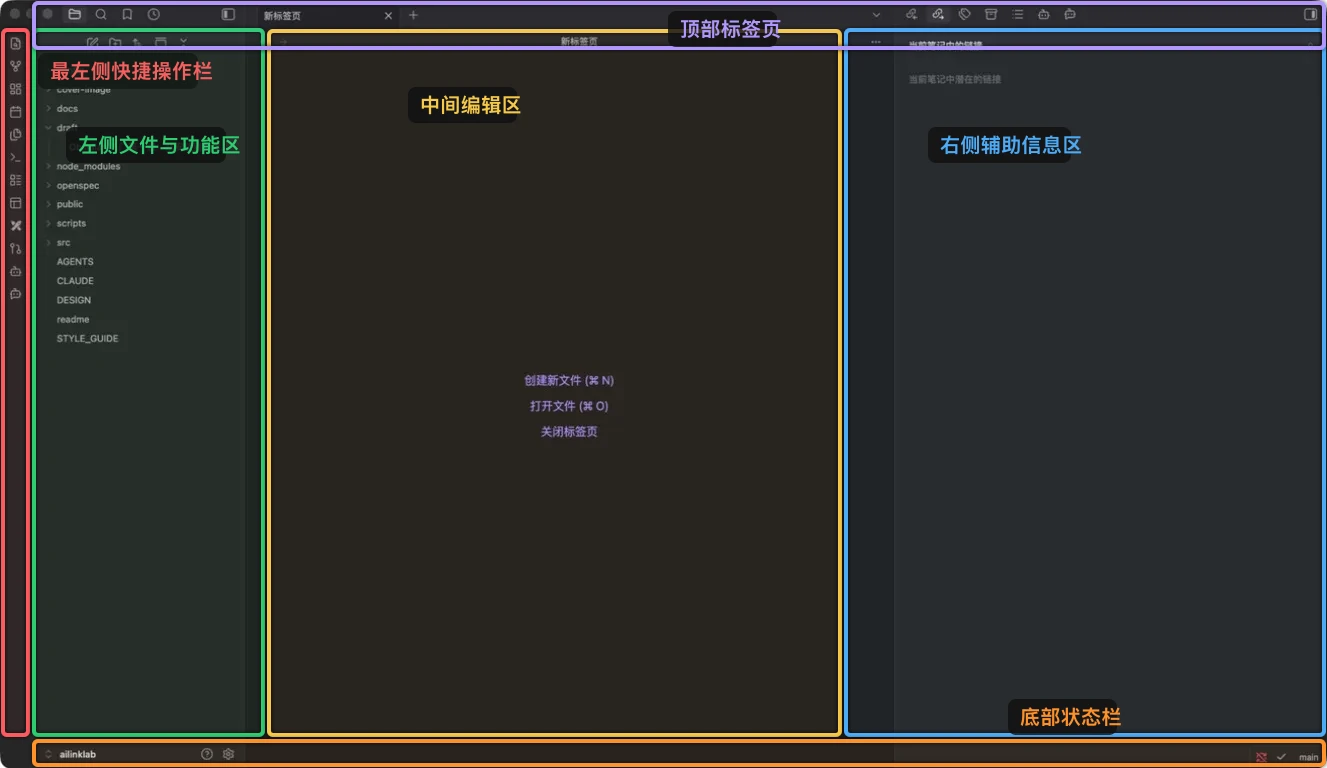
The colored outlines mark the main areas:
- Red: left ribbon
- Green: file and navigation pane
- Yellow: main editor
- Blue: right sidebar
- Purple: top tabs
- Orange: bottom status bar
Once you know what each area does, the interface stops feeling crowded.
The Left Ribbon
The thin icon column on the far left is the ribbon.
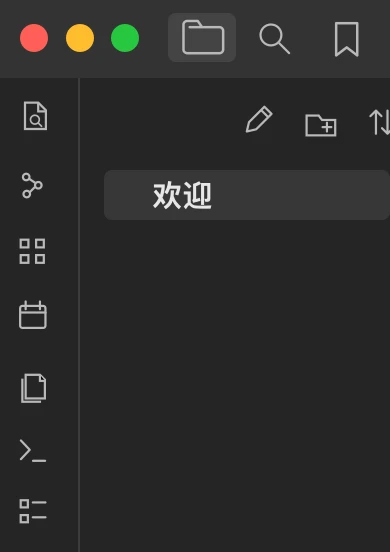
It usually contains quick entry points such as vault switcher, daily note, command palette, and settings. You do not need to memorize every icon.
Just know that this is the shortcut area. If you do not recognize an icon, hover over it. Obsidian usually shows the name.
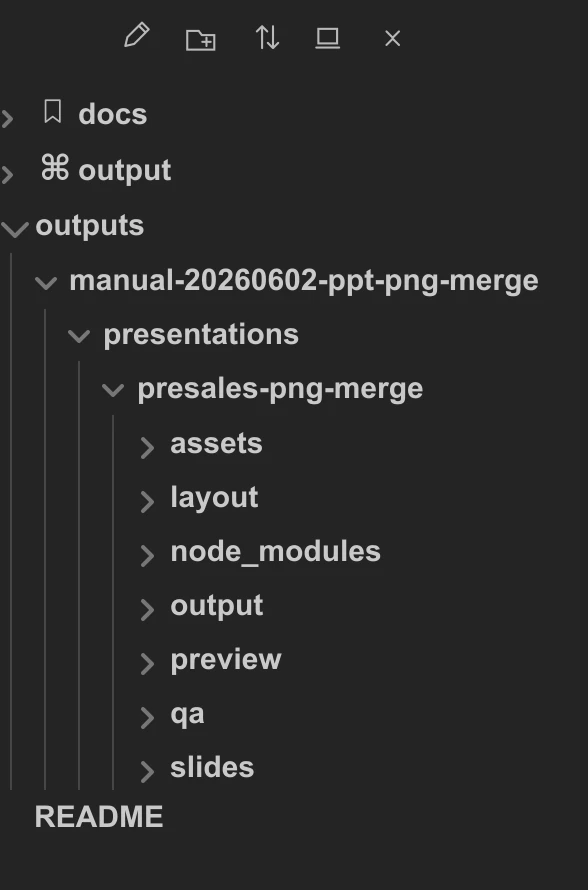
The Left Sidebar: Files, Search, and Navigation
The left sidebar is the area beginners use most.
It helps you:
- View folders
- View all notes
- Create notes
- Create folders
- Search the whole vault
- Manage bookmarks
Think of it as the navigation center for your notes.
The file explorer shows the folders and notes inside the current vault. This structure maps closely to the real folder on your computer. When you create, move, or rename files in Obsidian, the same changes happen in the folder.
Search becomes more valuable as your vault grows. With only a few notes, it may not feel important. With dozens or hundreds of notes, search becomes the fastest way to recover old material.
The Center: Where You Write
The center area is the main editor.
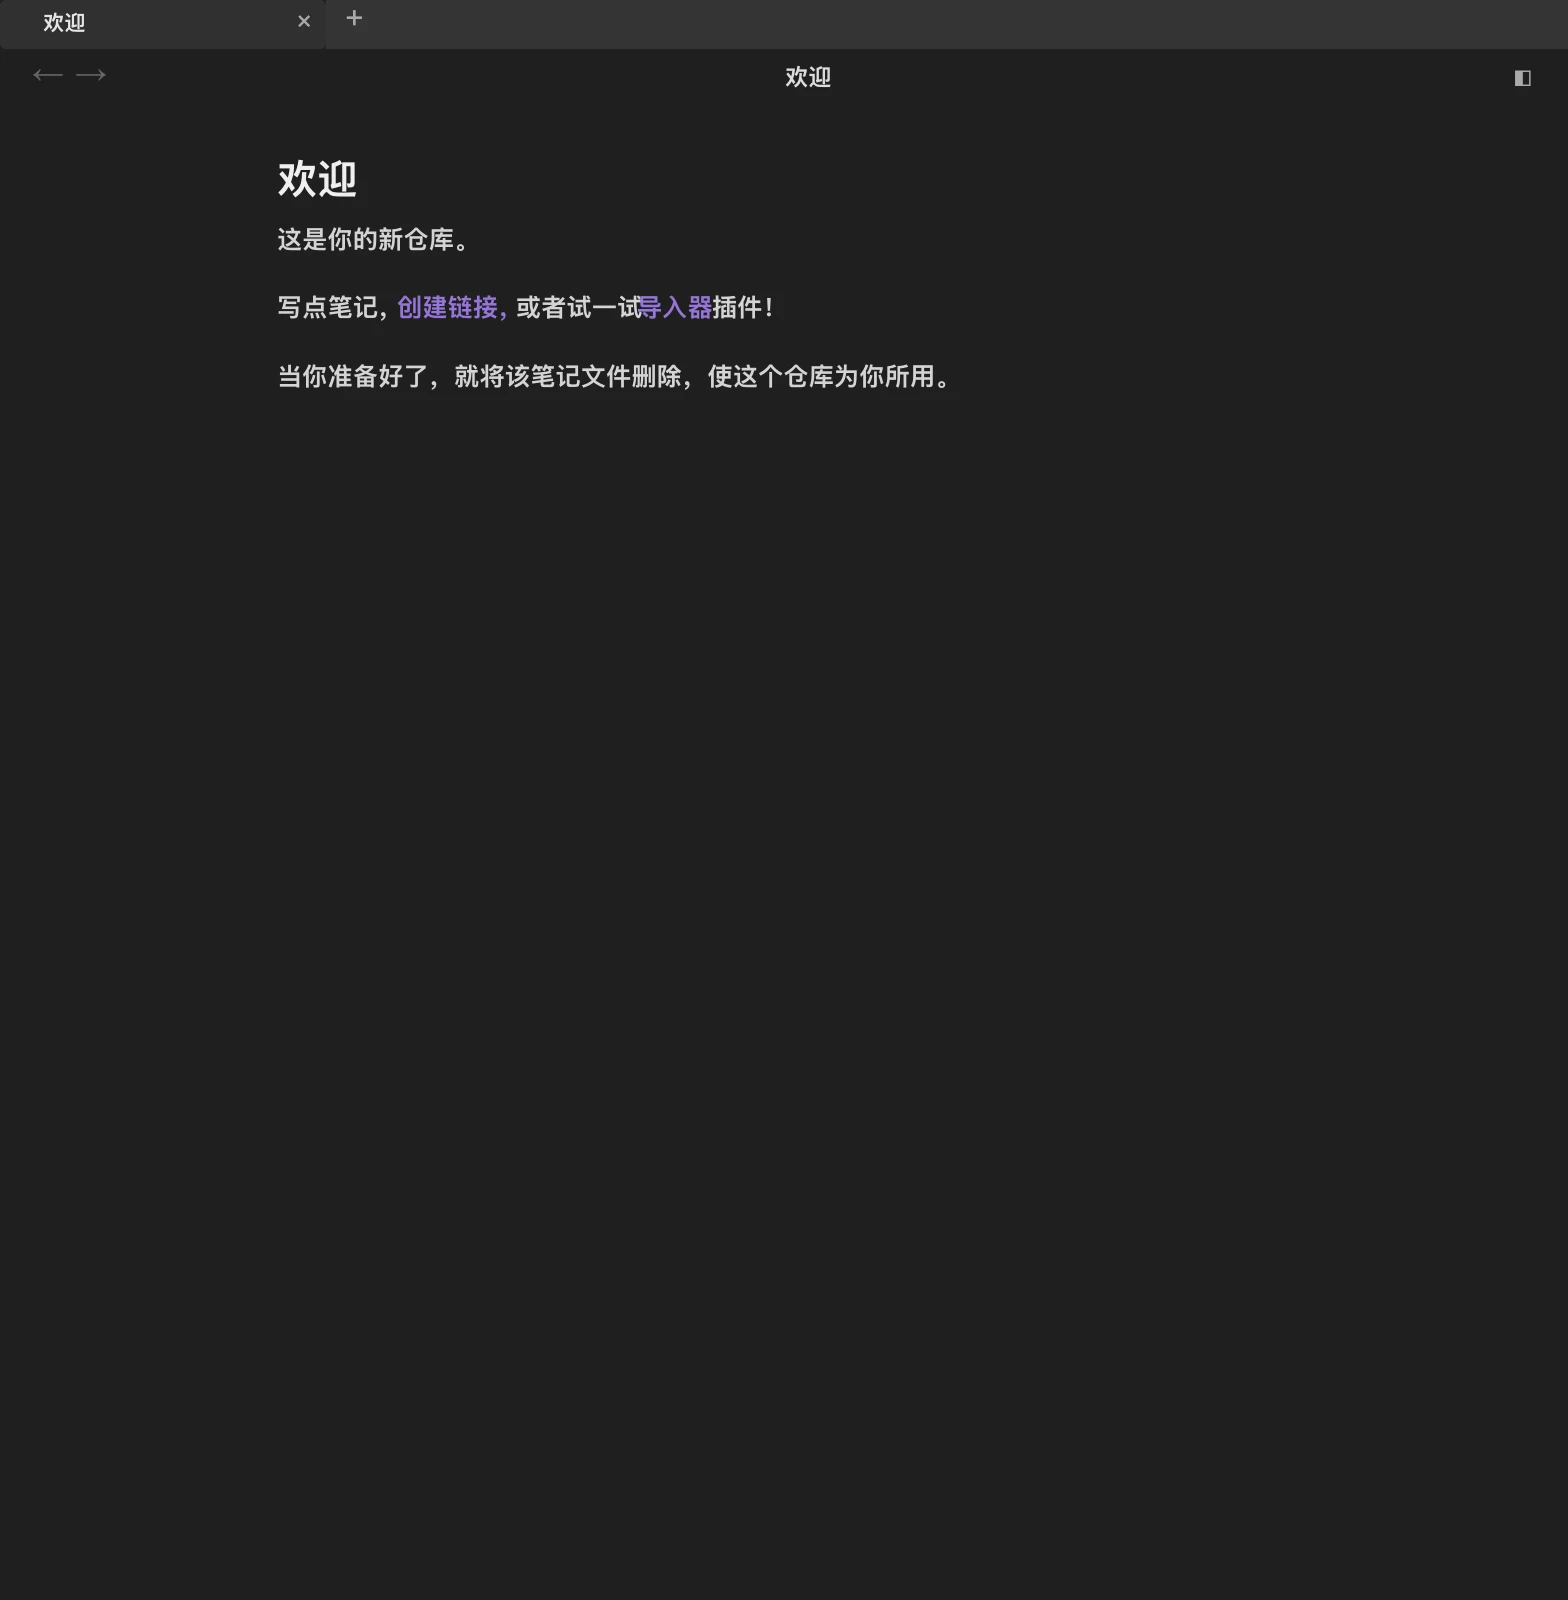
This is where you create, read, and edit notes.
The editor supports Markdown writing, reading notes, multiple tabs, split views, and switching between editing and reading modes.
You do not need to master all of Markdown immediately. Titles and lists are enough for the first day.
A simple note can look like this:
# My First Obsidian Note

Today I started using Obsidian.

I want to record three things first:

- Study notes
- Work reviews
- Writing ideas
Writing something real matters more than designing a perfect system.
The Right Sidebar
The right sidebar is for supporting information.
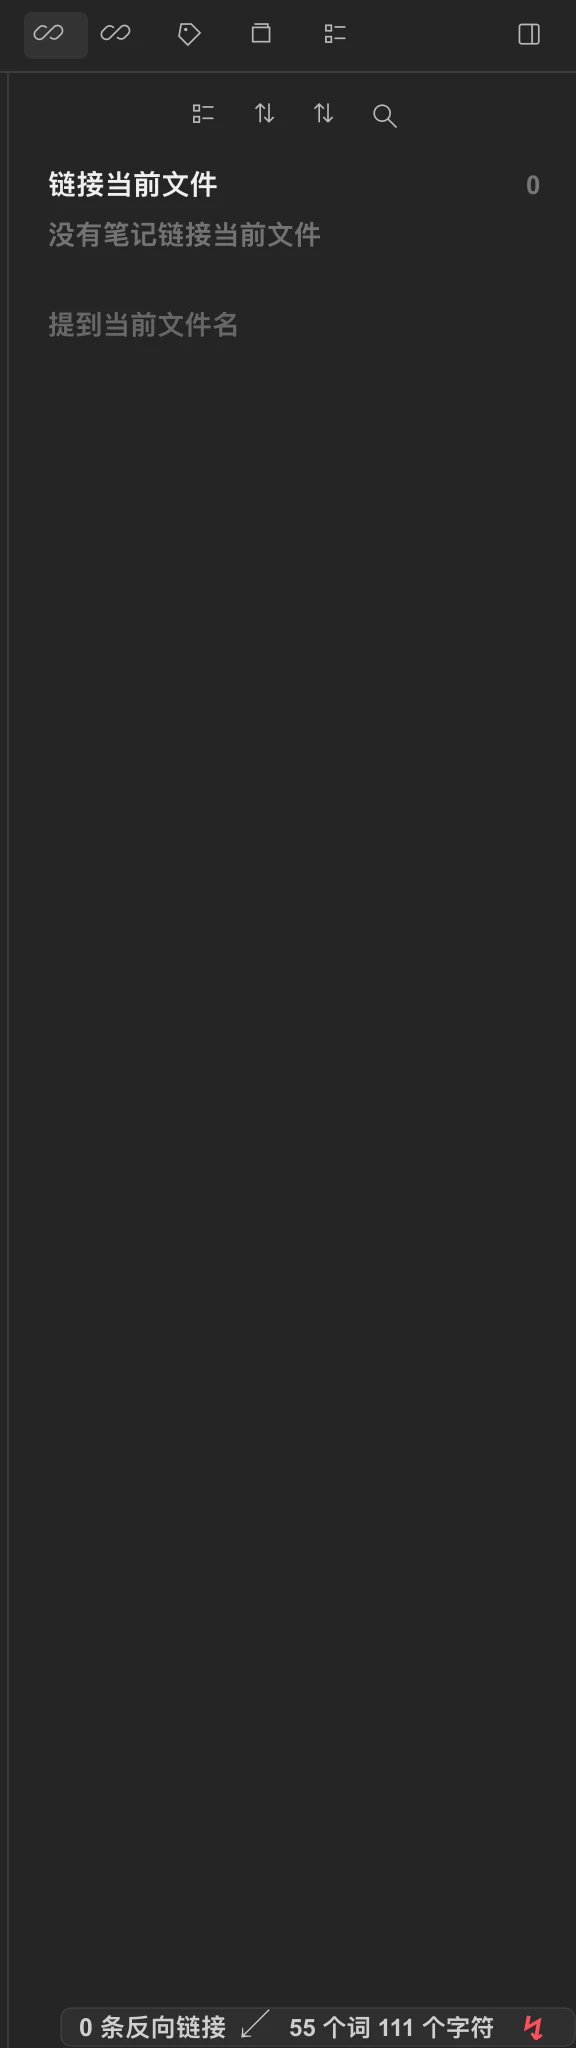
Common panels include outline, tags, current file information, and other supporting panels.
At the beginning, focus on Outline. It is generated from your headings and helps you jump around long notes, tutorials, book notes, and drafts.
You can learn the other right-sidebar panels later. On day one, just know that the right sidebar is for supporting information, not the main writing area.
Top Tabs and the Status Bar
The top area usually shows open tabs, the current file name, extra actions, and split-view controls.
If you open several notes, they appear like browser tabs.
The bottom status bar shows state information such as sync status, word count, or current mode. Beginners do not need to study it deeply. Treat it as a small status area.
How to Create Your First Vault
Do not over-design your first vault.
Use a simple name:
- My Notes
- Personal Knowledge Base
- Work Notes
- Study Notes
- Writing Material
Put it somewhere easy to find, such as your Documents folder or a dedicated Notes folder.
Avoid Downloads, system folders, and temporary folders. They make backup and sync harder later.
If you want sync in the future, you can move the vault into iCloud, Dropbox, OneDrive, or another sync folder. You do not need to solve that on day one.
The lower-left corner shows the current vault name. It also gives you quick access to help and settings.

Settings Beginners Should Check
Click the gear icon in the lower-left corner to open Obsidian settings. The left side is the settings panel. The right side shows the details for the selected section.
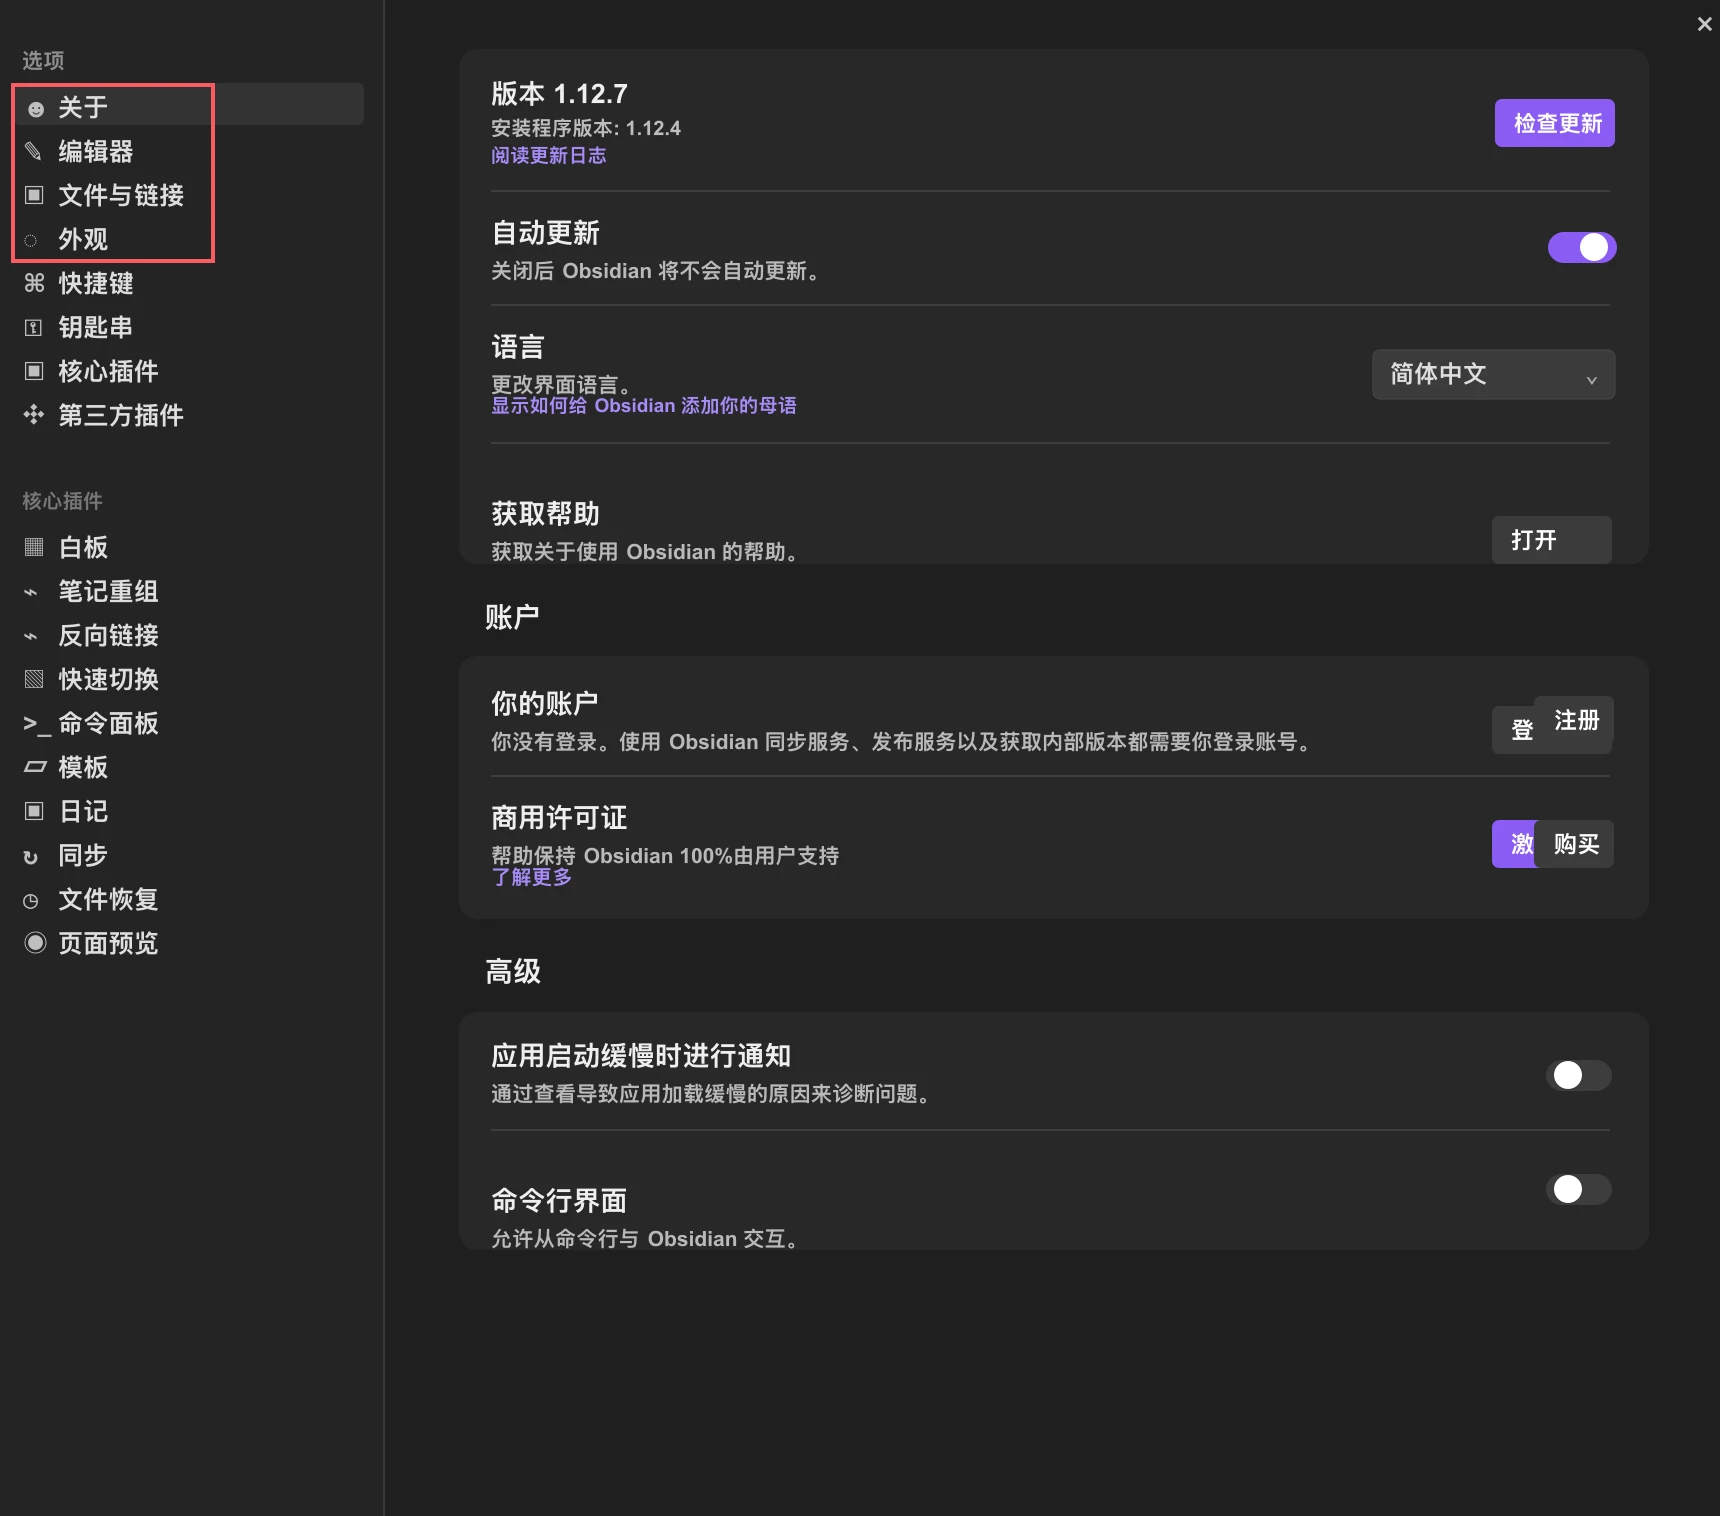
You do not need to study every setting on day one. Start with the first few entries on the left:
- About: check version, update status, and language
- Editor: adjust writing behavior, such as default editing mode, line numbers, and spell check
- Files and links: check where new notes and attachments are saved, and how deleted files are handled
- Appearance: switch dark mode or light mode, and adjust font size and interface zoom
These options answer the practical question: can you start writing comfortably? Core plugins, community plugins, and advanced settings can wait.
If the interface is not in your preferred language, start with About and change the language.
If the text is too small or the theme feels uncomfortable, open Appearance and adjust theme, font, and interface zoom.
If you want notes and attachments to stay organized, open Files and links and confirm the default save locations. That is enough for day one.
What to Do on Day One
Do not try to build the perfect knowledge system on the first day.
Follow this sequence:
- Create one vault
- Create your first note
- Create two folders
- Write a short paragraph
- Search for the content you just wrote
- Adjust theme and font size
The goal is not to “finish a system.” The goal is to prove that you can create a vault, write a note, and find it again.
If you can do those things, you understand the foundation of Obsidian.
Common Mistakes
The first mistake is changing too many settings immediately.
Obsidian has many settings, but on day one you only need the interface language, comfortable reading, and file locations to be clear. Change other settings when you actually need them.
The second mistake is designing a complicated folder system too early.
Do not start with ten levels of folders. Start writing. Once you have enough notes, the useful categories become obvious.
The third mistake is treating a vault like cloud storage.
A vault is a local folder. It does not automatically sync by itself. Sync requires Obsidian Sync or another sync tool.
The fourth mistake is trying to learn every feature on day one.
Start with installation, the interface, folders, and your first note. Later features can come one article at a time.
Final Advice
The first things to learn in Obsidian are not themes or complex workflows. They are vaults, folders, and notes.
Install the app, create one vault, write your first note, and understand the left sidebar, editor, and right sidebar. Once you can do that, Obsidian is already useful.
The next step is learning how to write a strong first note and how to use folders to build a personal knowledge base gradually.